13/03/2017
Goaccess
 One of the best software I start using this year is goaccess, it’s AWSOME!
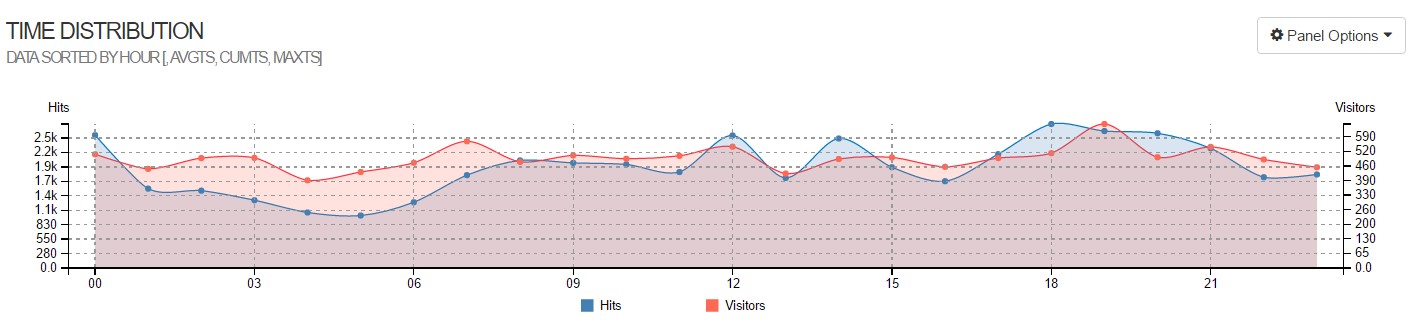
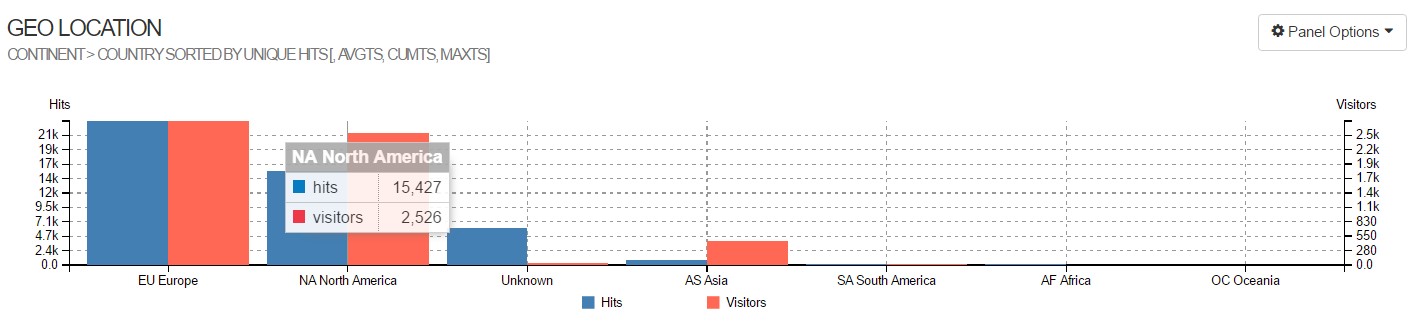
Basically goaccess is a web log analyzer, like awstats or webalizer, like them It’s simple, it’s quick, it’s very useful, but unlike them it produces very very beautiful reports.
Just be careful, goaccess it’s not like Google Analytics or Piwik, it doesn’t track uses via javascript and does not analyze visitors but only access logs.
That’s another reason why I love it, if you need to quickly analyze your logs to find a problem or to find the reason of a particular load spike goaccess is your tool.
Another great feature if this tool is that you can simply pipe stdout to feed goaccess, for example you can parse your logs with sed, awk and grep and get a quick analysis.
Goaccess install is really simple, it’s included in the most used repositories for the major GNU/Linux distros, but I strongly suggest to clone it from the official git repository and follow the simple compile syntax, just remember some requirements:
- GeoIP and GeoIP-devel
- autoconf and automake
- tokyocabinet and tokyocabinet-devel (for incremental analysis)
Last but not least goaccess has a very good support from its maintainer and the community, if you have a question, a problem or a request open an issue and you’ll have a quick answer from kind and collaborative people.
Recently I had a problem with some strange logs, I asked for a solution, I discussed directly with the project maintainer and he agreed to add a new feature to fix this kind of logs; if I had this problem with some sort of super-enterprise commercial software from IBM, Oracle or any other big company I will surely had to open tickets over tickets (with an active support subscription), write mails over mails, get some huge conference calls with people all over the world and *perhaps* have a workaround and the promise of a patch in the next major version of the product… :\
Here is a simple cheatsheet of goaccess syntaxes I use the most of times.
A simple analysis from command line (change COMBINED with COMMON if you want to analyze logs with common format):
goaccess --log-format=COMBINED -f /var/log/httpd/access_log*
Html output (very very beautiful for presentations or visual reports)
goaccess --log-format=COMBINED -f /var/log/httpd/access_log* -o /tmp/report.html
Parse logs from several directories
cat /var/log/httpd/access_log /var/log/apache2/request.log | goaccess --log-format=COMBINED
Exclude a pattern from the analysis
grep -v "GET \/exclude_this_path\/" /var/log/httpd/access_log | goaccess --log-format=COMBINED
Exclude several patterns from the analysis
grep -vE "GET \/exclude_this_path\/|file_to_exclude.html|gif_to_exclude.gif" /var/log/httpd/access_log | goaccess --log-format=COMBINED
Analyze only logs between two specific hours (for example 8:00AM to 9:10AM)
sed -n '/01/Mar\/2017:08:00/,/01\/Mar\/2017:09:10/ p' access_log | goaccess --log-format=COMBINED
Analyze COMMON logs with X-Forwarded-For ip format (xxx.xxx.xxx.xxx, yyy.yyy.yyy.yyy, zzz.zzz.zzz.zzz)
goaccess --log-format='%h,| %^ %e [%d:%t %^] "%r" %s %b %^' --date-format='%d/%b/%Y' --time-format='%T' -f /var/log/httpd/access_log
Analyze COMBINED logs with X-Forwarded-For ip format (xxx.xxx.xxx.xxx, yyy.yyy.yyy.yyy, zzz.zzz.zzz.zzz)
goaccess --log-format='~h{," } %^ %e [%d:%t %^] "%r" %s %b %^' --date-format='%d/%b/%Y' --time-format='%T' -f /var/log/httpd/access_log
Keep your goaccess database open for incremental analysis (database files in /tmp)…
goaccess --log-format=COMBINED -f /var/log/httpd/access_log --keep-db-files
…and add new logs to the analysis and keep the database open (database files in /usr/local/temp)
goaccess --log-format=COMBINED -f /var/log/httpd/access_log --load-from-disk --keep-db-files --db-path=/usr/local/temp
Give it a try and I’m sure you’ll love it!