20/06/2024

The first real long ride

I just finished my first long ride on my bike (~ 2000 Km in 4 days) after 3 years of riding and more than 42k Km on the bike.

This was my fist group ride, until now I done all the 42k Km on my bike as solo rider.

It was a blast, I really enjoyed it but I also made mistakes and learned a lot, here’s some suggestions I can give as a newbye:

Don’t underestimate the “emulation effect” of the group.

Riding with people with more experience or more powerful bikes than you means that you’ll always try to keep the pace and ride like them: DON’T DO IT.
Keep your pace, ride at your speed, nowadays everyone has a phone which can work as a GPS navigator, maybe you’ll arrive later, that’s fine, but don’t underestimate the danger of riding at other people speed or pace.


Riding comfort matters.

Riding is hard for your body, don’t feel ashamed to stop to make you butt rest or to drink some water.

Long rides are like marathons, completing them is already like winning them.

Consider riding underpants (like these https://www.revitsport.com/us_en/motorcycle-pants-airborne-2-black ) and a comfort seat, usually riding gear is not comfortable and will scratch you skin after hours of riding, those underpants prevent this and will help with sweat.

A mistake I did was using underwear like this and the last days they caused me a huge pain on the edges because of rubber bands, small details like that can make a huge difference between a comfortable and fun ride and a constant pain in the ass (literally).


Take it easy, take your time

Don’t let the trip consist only in riding riding and again riding, otherwise you’ll end up exhausted.

If you found a stunning panoramic view stop and enjoy it, this will help your mind and your body.

If you want to take a photo stop and do it, remember: it’s not a race, it’s an holiday.


Start early, end early.

Usually I hate to get up early in the morning, but in a riding trip it’s the best solution.

Riding when you’re exhausted is too dangerous, you’ll risk mistakes that can be fatal; also consider that, as I said, riding is hard for your body, you’ll see very soon that even if you to sleep early (early than your usual habits) you’ll fall asleep in no time.


Get a good H2O protection gear.

Riding wet is an awful experience, that may seem obvious but it still true.


Get an helmet with pinlock

Ride early in a chilly morning or under the rain may cause your visor to get foggy.

Buy a helmet with a pinlock ready visor, and mount the pinlock, it’s the cheapest and most effective way to prevent this problem, it will make a huge difference, believe me.


Stop when you don’t enjoy riding anymore.

After hours and hours of riding is perfectly normal to not feel the ride enjoyable, that’s the moment you have to stop, take a break or find a place to rest, don’t force you to reach your goal for the day.

03/06/2022

Lone Rider Overlander

Few days ago I received a new gift for my beloved Noraly: a brand new 30 liters Lone Rider Overlander bag.

I don’t want to spend all day talking about specs and make a full review, there’s plenty of videos and rewiews online.
I just want to give a quick personal feedback on the bag because I just used it for my longest trip (around 1500 Km from north to the center of Italy on backroads).
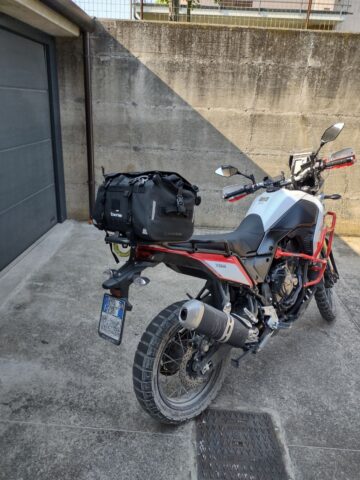
First of all the bag is sturdy, it’s really tough and worked perfectly.
It’s “only” 30 liters, there’s a bigger one but I choose this one because it has the perfect size for small/medium trips, can easily carry a full size rain cover and also my helmet, so I can use it for daily trips using it as a backpack without bothering about my helmet.

Despite the size it can contain much more stuff than I imagined, the way the bag closes also helps a lot in case you need to carry more than the official 30 liters.

The bag is secured to the bike frame with a full set of straps that can easily adapt to any situation, and there are also extra straps to attach another bag to it, just in case you need extra space.
At first I was unsure if the straps could resist with an heavy load, so I decided to use additional plastic straps to secure it as a precaution, but at the end I realized it was not necessary.
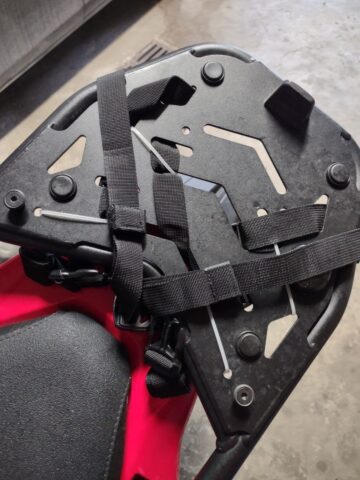
The quick attachment/release system is really really good, it’s easy to use, it’s quick and using four different clips it keeps the bag in its place.
Every strap also have a piece of velcro at the end to wrap the extra strap and fix it in place, a very simple and clever solution to avoid your straps to fly around like flags while riding.

During this trip I catched some rain, and the stuff inside remained completely dry all the time with no problems, just remember to close the air valve if you’re planning to ride in the rain.
This air valve is another really clever solution, if closed properly the bag is completely sealed from the outside, so with this valve you can squeeze the outlander to push outh most of the air, in this way if you close the valve the bag keeps some sort of negative pressure inside to keep it smaller, even if you overload it.

The bag also has a nice aluminium insert that you can use to secure it to the bike frame, I purchased a Steelcore strap as suggested by Lone Rider; this provide a nice way to secure the bag to the bike frame and lock it in place if you need to stop in crowded places (for example if you need a brake for lunch or go to the bathroom).
In this way no only the bag is impossible to open without cut it (and believe me, the outer shell is really tough, you need a really big and sharp knife, with a pair of scissors it’s almost impossible to cut) but the Steelcore wrap provides an additional way to secure the bag to the bike frame.

The only bag element that is not secured is the top cover, but it also has a quick attachment system with four plastic clips, so you can easily detach it if you need to take a brake and leave the bike alone; this top cover is not too big but it’s very useful for documents or small stuff, in some sense it feels like a small tank bag, just attached to the main bag and out of the way (which is nice because I don’t like tank bags too much).
On one side of this top cover you have this nice transparent bag for documents, on the other side you have a lot of molle webbings to attach additional bags or stuff to the bag, for example I used them to attach a canteen for water using a couple for velcro straps and an aluminium snap hook.
The transparent document bag is attached with velcro, so you can easily take it out, and underneath you’ll find another big pouch closed with a zip; Lone Rider suggest to use this puch for a camel bag, but I decided to put inside this small stuff like sunglasses, usb chargers and cables, and emergency cellphone, the only problem is that this puch is not waterproof, so be careful and use a plastic bag to keep your items dry.
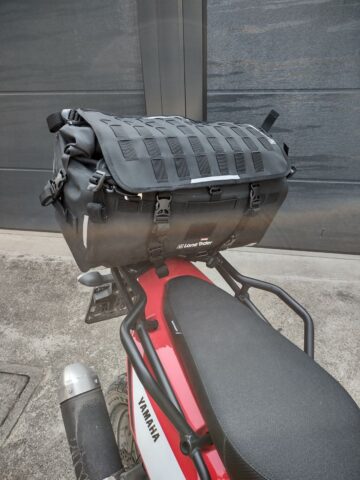
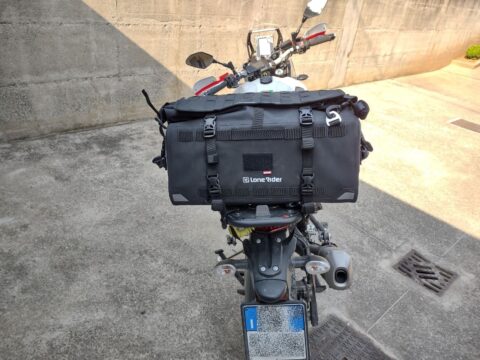
I’m a big guy, and at first I was worried that the bag could be too big and too close to my back, because while riding I often change position to get some comfort and prevent butt sore.
With the Outlander this problem simply does not exist, the bag is out of the way and stays only in the back pannier rack, there’s no way you can feel it with your back or can cause any issue if you ride with a passenger.

Another thing I was worring about was the bike balance while riding; my outlander was packed with enough stuff for an entire week, it was heavy (I forgot to weight it, but I think it was around 15 Kg, maybe more), and while I was riding I felt absolutely nothing, basically I rode my bike as I was not carring a thing on it.

Honestly I’m very happy with it and maybe in the future I will also get the 48 liters version for longer trips or holidays; I’m planning to buy Mosko Moto side bags, and I think this Outlander is the perfect companion for them.
In the end I think the bag is really good, it’s not cheap but its quality justify the price, the only things I can suggest to Lone Rider are:

  • provide an extra set of straps to secure the bag to the bike, they’re ok and sturdy but anyone can steal them from the bike during the night or while the bike is parked.
  • the air valve is a really nice solution, but I’m worried that it can broke (it’s make by plastic and is glued to the bag), in this case the bag would not be waterproof anymore.
  • put a single “backpack style” strap on the top cover, so in case of a break you can easily carry it (if you go to the bathroom you hook it somewhere without worring to put it on a filthy floor)
  • make an arrangement with Steelcore to sell a bag+strap combo, because their shipment costs are insane (I payed 50 € for the strap + 25 € for the shipment, which is insane considering the package was already in the EU).
23/01/2022

Outback Motortek crash bars combo + euro 5 skid plate

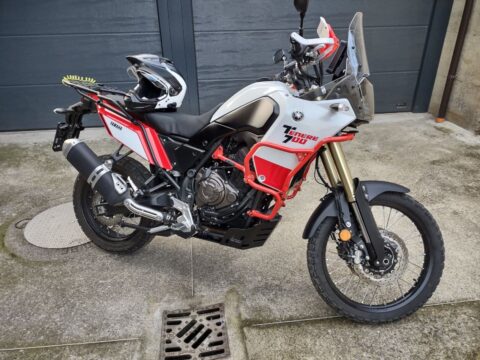
New gifts for my beloved Noraly, finally I’m able to test Outback Motortek crash bars combo and the new euro 5 skid plate.

I bought these new components a few moths ago but I was able to get them installed only now on my 2nd service by Yahama.
At first I would like to install them by myself following the excellent instructions from Outback Motortek (covering all the key aspects, torque on every screw, what kind of threadlocker use etc etc..), but some of the screws need to be threaded on the bike frame, and I don’t have the right equipment to do it properly, instead of damaging the bike I preferrend to pay someone more competent than me to do the job, remember one of the key principles on a motorcycle: be humble :)

Why did I choose these products instead official Yahama ones?
Well it’s pretty simple, all started with the crashbars, I knew I need them, the bike could fall in any moment and it’s better to scratch some steel bars than the bike plastics (or worst like engine, frame etc etc…).
Yamaha crashbars are well built, are strong, in some sort they are minimalistic… but I found them horrible to look at, everytime I look to them my mind goes to Ferengi ears from Star Trek.

So I started to look around for some other products, I checked many of them from Givi, Touratech, Sw Motech, Heed, Adventure Spec and Outback Motorek, and I found the last better.
First of all they are really really sturdy, they’re made by two parts (lower and upper) linked together, they have more mounting points then all the others (which help to distribute the load on several points in case of a crash), and they are also available in several colors, obviously I choose red which look amazing to me.

The only problem with Outback Motortek crash bars is that they barely fit with the euro 5 T7 because of the catalytic converter plate.
I had three options:

  1. remove the catalytic converter plate (no way, the damn thing is expensive and I don’t want to damage it because of a stupid flying stone)
  2. bent or cut the catalytic converter plate (it’s a cheap piece of aluminium but I don’t like this solution)
  3. buy the new Outback Motortek euro 5 skid plate they launched few weeks before

I choose the 3rd one, and I don’t regret it because it looks amazing, it’s super sturdy, it’s not so heavy and covers perfectly the catalytic converter, honestly way better than the oem plate.

Obviously it’s not all puppies and rainbows, there are some cons, mainly because of the added weight.
Crash bars weight is 5.6 Kg, skid plate weights 3 Kg, did they matter? Can I feel them?
Oh yes, It may not sound a lot but I can feel them, and honestly it’s not a bad thing.

The bike now feels a little bit more stuck to the road and I’m feeling more confident on tarmac specially on fast corners; it feels like I lowered the weight balance of the bike, which is not a bad thing considering that the T7 is known for having a really high weight balance point.

On the other hand the bike front wheel feels a little bit heavier, and any ground obstacle or hole feel heavier on the handlebar.

It’s interesting because the difference is almost subtle and I though I would not notice it, but I can feel it, it’s not bad, it’s… interesting.
It’s not like I’m riding a different bike, but I can still feel it, I’m sure It’s only a matter of time before for this new feeling to become normal.

Now it’s time to think to the next upgrade :)

22/09/2021

Seat Concepts tall comfort seat

Time for a gift to my beloved Noraly (and to my also beloved butt), finally my new Seat Concept seat is arrived and I’ve been able to test it on a few trips.

When I bought my T7 I immediately also bought an OEM Yamaha Rally seat because I’m 193 cm and the standard seat was a bit too low for me. The Rally seat is very very beautiful and its height is perfect for me, I’m able to flatfoot easily and my riding position is perfect, however there was a problem: sore butt.

At first I was struggling after only half an hour of riding with tingling legs and sore butt, and I was absolutely sure that the main problem was practice.
With more and more travels this problem became less and less annoying, after a few months I was able to ride up to almost 3 hours without any tingling or pain, I was able to get some relief changing my riding position frequently or standing on my footpegs, but still I can’t say It was a comfortable ride.

At that point I started to look for some aftermarket seats, and throught https://tenere700.net I was able to get a discount for the new Seat Concepts products, in particolar I was interested in the new one piece tall comfort seat.
The price is good, shipping from USA is expensive but I was able to get a nice discount from the official Seat Concepts seller on tenere700.net, and the total price was almost the same as the OEM Yamaha Rally seat; sadly I live in Italy and our famous bureaucracy decided that I had to pay 120 extra € for custom fees and taxes (a tax on a tax, can you beleave it? :\ ).

Seat Concept’s customer care was also super good and very kind, they’ll help you in any possible way to choose the best seat for your needs considering your riding style, your weight, how tall are you and so on. You can choose you seat details, colors, materials and also what kind of foam is better for you.

And here we are, finally the seat is arrived and my firts impression was WOW!
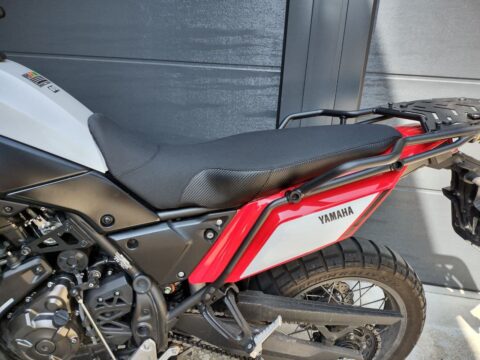
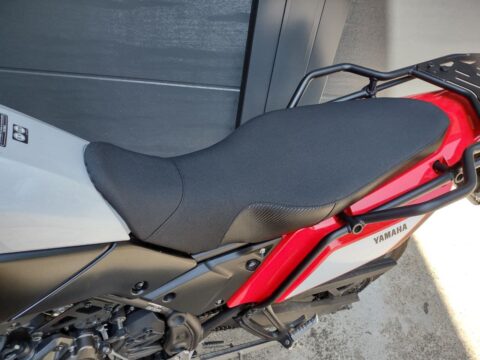
The seat is so wide compared to the rally seat (which is very narrow, also compared to the standard T7 seat) and the foaming is slightly softer than the standard and the rally seat (I let Seat Concepts choose the right foam for my weight and riding style).
The seat height is the same as the rally seat, but because of it’s shape it feels like it’s a little bit higher.
The comfort is great, compared to the rally seat it feels like a top class sofa, and thanks to it’s shape now my knees angle is wider and using shifting or brake pedals is much more comfortable and feels more natural than before.

The only issue I can think about it is that the small underseat storage room is the same as the standard seat, and smaller to the rally seat I was used to, so I had to adjust my emergency tools and documents pocket to it, but as you can imagine this is not big deal.

In the end I think I made the right coice, the seat is perfect for my needs, it’s really comfortable on the street and don’t interfere at all when you standup on your footpegs during offroad.
The price is reasonable and the customer care is awesome, I only hope that some day Seat Concepts will have some EU store or reseller.

28/04/2021

Journal of a newbie biker EP1

I decided to create a new series of posts about my experience as a newbie biker, I thought it can be fun to read it in a few years and maybe It can be useful to other new bikers to avoid my errors or to better understand the most common problems.

Lesson number one: don’t trust the fuel indicator on your bike.
Looking to older bikes without any fuel indicator (only the reserve light) I always thought how people can use them, I mean how can you plan any trip without knowing how much fuel do you have in your tank?!?
Well, my bike has a beautiful fuel indicator on its dashboard, I won’t say it’s useless, but honestly it’s not accurate at all or at least it’s not as useful as in cars.
If you think about it it’s perfectly normal, bikes have smaller tanks than cars (my bike has a 16l tank), bike’s tank has a totally different shape than car’s one, so accelerations and turning around makes the fuel move much more inside the tank and the tank sensors can’t always get the exact amount of fuel in the tank itself.
Don’t get me wrong, fuel indicators are useful but they are not very precise, so one thing you must learn is to reset the trip counter after each refueling, after a while you know how many Km you can travel before the fuel reserve.

Lesson number two: never downshift multiple times without releasing the clutch.
Gears on a bike are different from cars, multiple downshifting on cars is not recommended but it’s not a big deal, on bikes can cause problems or can get shifting stucked.
I usually don’t do it, it happened to me a couple of times while I was stopping suddenly, and after that I noticed that my gear indicator and the shift pedal seems to be stucked; solving the problem was easy, I was standing still and I only had to slowly release the clutch while moving the bike a little bit forward using my feet, in this way the shifting started working again and everything was fine.
I repeat, It can happen specially if you’re new to bikes, but don’t do it on purpose. Each time you make a downshift release the clutch, even for a couple of seconds, the engine will help you to slow down and you’ll make your gears work properly.

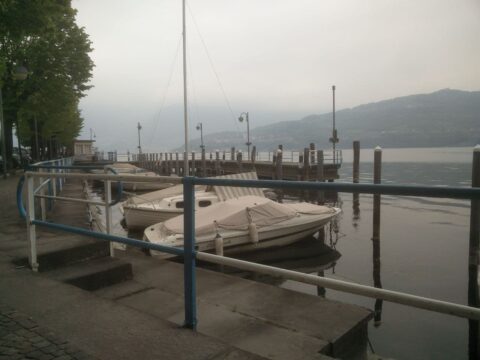
And now a pic from my today trip, the longest so far on my biker career, around 100 Km to the nearest lake to my little town ;P

« Post precedenti